
개발자입니다
[비트캠프] 35일차(7주차5일) - Javascript(Promise, fetch) 본문
[비트캠프] 35일차(7주차5일) - Javascript(Promise, fetch)
끈기JK 2022. 12. 23. 10:09
Promise
요청과 node js 처리 과정

Web Browser가 ① /hello 요청을 HTTP로 NodeJS에 한다. NodeJS는 ② /hello 의 핸들러를 call을 app.js에 요청하고 app.js에서는 ③ 실행한다. 결과를 ④ return 해서 NodeJS에 주고 NodeJS에서 ⑤ 응답 으로 Web Browser로 준다.
사람으로 생각해보면 Web Browser가 ① /hello 요청을 NodeJS에게 한다. ② call(req, res) 을 /hello 핸들러에게 한다. req는 요청을 다루는 객체(도구), res는 응답을 다루는 객체(도구) 이다. /hello 핸들러에서 ②-1 응답헤더 설정하고 ③ setTimeout() 을 timeout 핸들러에게 전달한다. /hello 핸들러가 ④ return 을 NodeJS에게 하는데 아직 콘텐츠를 보내지 않았기 때문에 응답이 완료된 상태가 아니다. timeout 핸들러는 3초 후 ⑤ res.send() 실행하여 콘텐트 출력한다. 그리고 ⑥ 콘텐트 출력을 NodeJS에게 보낸다. 이를 ⑦ 응답으로 Web Browser에게 전달한다.
Promise
여러 개의 비동기 작업들을 순서대로 실행시키는 문법
new Promise(executor) 에서 executor는 함수이고 작업자라 불린다. executor를 실행한 후에 Promise 객체(계약자)에게 결과를 전달한다. Promise 객체에서 약속에 따라 등록된 함수를 실행한다. 작업자는 통지를 계약자에게 하는데 resolve() 또는 reject() 중 하나를 한다. resolve() 의 통지가 오면 작업 결과를 처리하는 함수를 실행한다. reject() 의 통지가 오면 예외 처리하는 함수를 실행한다.
Promise - 생성자와 작업 함수(executor)
Promise 문법
- 시간이 오래 걸리는 비동기 작업들을 순서대로 묶어서 실행하고 싶을 때 사용한다.
new Promise(executor)
- executor: 생성자가 실행시킬 함수다.
- executor의 호출이 완료되어야만 Promise 객체를 리턴한다.
Promise 객체
- executor가 실행한 비동기 작업 결과를 통지 받는다.
- 통지 결과에 따라 약속된 다음 작업을 실행한다.
- 정상적으로 이행(fulfill)했다고 통지 받으면, funfill 상태일 때 호출하기로 약속한 함수를 실행한다.
- 어떤 이유로 작업 수행을 거절(reject)했다는 통지를 받으면, reject 상태일 때 호출하기로 약속한 함수를 실행한다.
// ex08\exam01-1a.html

<script>
let executor = (resolve, reject) => {
  // 시간이 오래 걸리는 동기 작업 수행
  var xhr = new XMLHttpRequest();
  xhr.open("GET", "http://localhost:3000/hello", false);
  xhr.send();
  console.log(xhr.responseText);
};

const promise = new Promise(executor);
// Promise 생성자의 executor 호출이 끝날 때까지 리턴하지 않는다.

console.log("끝!");
</script>
- Promise 생성자에 전달한 executor의 호출이 끝날 때까지 Promise 객체를 리턴하지 않는다.
- 따라서 executor 에서 작업 시간이 오래 걸리는 동기 작업을 수행하는 것은 바람직하지 않다.
- 즉 executor에 비동기 작업이 없다면 Promise를 사용하는 이점이 없다.
//app.js

const express = require('express');
const request = require('request');

const port = 3000;
const app = express();

app.use(express.urlencoded({extended: true}));


app.get('/hello', (req, res) => {
  res.set('Access-Control-Allow-Origin', '*');
  res.set('Content-Type', 'text/plain; charset=UTF-8');

  setTimeout(()=> {
    res.send("Hello!");
  }, 3000);
});
Promise - 생성자와 작업 함수(executor)
executor 함수를 분리하지 않고 Promise 파라미터에서 바로 정의한다.
<script>

// executor의 정의를 파라미터에서 수행
const promise = new Promise((resolve, reject) => {
  var xhr = new XMLHttpRequest();
  xhr.open("GET", "http://localhost:3000/hello", false);
  xhr.send();
  console.log(xhr.responseText);
});

console.log("끝!");
Promise - 작업 함수(executor)와 비동기 작업
비동기 작업은 Promise 생성자가 작업 함수 호출이 끝나는 즉시 Promise 객체를 리턴한다.
<script>
const promise = new Promise((resolve, reject) => {
  // 시간이 오래 걸리는 비동기 작업 수행
  var xhr = new XMLHttpRequest();
  xhr.onreadystatechange = function() {
    if (xhr.readyState == 4) {
      console.log(xhr.responseText);
    }
  };
  xhr.open("GET", "http://localhost:3000/hello", true);
  xhr.send();
});

// Promise 생성자는 작업 함수(executor) 호출이 끝나는 즉시 Promise 객체를 리턴한다.
// => 작업 함수에서 실행하는 비동기 작업이 끝날 때까지 기다리지 않는다.
console.log("끝!");
Promise - 비동기 작업의 완료를 통지하기
<script>
const promise = new Promise((resolve, reject) => {
  var xhr = new XMLHttpRequest();
  xhr.onreadystatechange = function() {
    if (xhr.readyState == 4) {
      console.log(xhr.responseText);
      resolve(); // 약속된 작업을 처리했다고 통지한다.
    }
  };
  xhr.open("GET", "http://localhost:3000/hello", true);
  xhr.send();
});

console.log("끝!");
promise 객체가 작업자(executor)로부터 작업 완료를 통지를 받았을 때 호출할 함수가 등록되어 있지 않다면 아무런 일도 수행하지 않는다.
Promise - 비동기 작업을 완료한 후 다음 작업 실행하기
promise.then으로 작업 완료 후 다음 작업을 실행할 수 있다.
<script>
function onFulfilled() {
  console.log("fulfilled!")
}

const promise = new Promise((resolve, reject) => {
  var xhr = new XMLHttpRequest();
  xhr.onreadystatechange = function() {
    if (xhr.readyState == 4) {
      console.log(xhr.responseText);
      resolve(); // 약속된 작업을 처리했다고 통지한다.
    }
  };
  xhr.open("GET", "http://localhost:3000/hello", true);
  xhr.send();
});

// 작업 완료를 통보 받았을 때 호출될 함수를 등록한다.
// => resolve()로 통지했을 때 호출된다.
promise.then(onFulfilled);

console.log("끝!");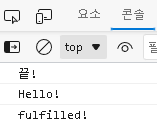
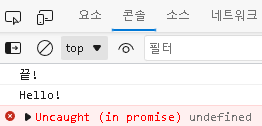
Promise - 비동기 작업을 실행하는 중에 오류가 발생했음을 통지하기
오류 발생시 reject() 를 실행한다.
<script>
const promise = new Promise((resolve, reject) => {
  var xhr = new XMLHttpRequest();
  xhr.onreadystatechange = function() {
    if (xhr.readyState == 4) {
      console.log(xhr.responseText);
      reject(); // 문제가 발생하여 약속된 작업을 거절한다고 알린다.
    }
  };
  xhr.open("GET", "http://localhost:3000/hello", true);
  xhr.send();
});

console.log("끝!");
executor로부터 작업 거절 통지를 받았을 때 그것을 처리할 함수가 등록되어 있지 않다면 예외가 발생한다.
Promise - 작업 거절 통보를 받았을 때 수행할 함수를 등록하기
거절 통보시 수행할 함수를 등록한다.
<script>
function onRejected() {
  console.log("rejected!")
}

const promise = new Promise((resolve, reject) => {
  var xhr = new XMLHttpRequest();
  xhr.onreadystatechange = function() {
    if (xhr.readyState == 4) {
      console.log(xhr.responseText);
      reject(); // 문제가 발생하여 약속된 작업을 거절한다고 알린다.
    }
  };
  xhr.open("GET", "http://localhost:3000/hello", true);
  xhr.send();
});

// executor로부터 작업 거절을 통지받았을 때 호출될 함수를 등록한다.
promise.then(undefined, onRejected);

console.log("끝!");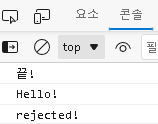
Promise - then(onFulfilled, onRejected)
promise.then(이행 함수, 거절 함수) 로 이행 또는 거절시 실행할 함수를 한번에 등록할 수 있다.
<script>
function onFulfilled() {
  console.log("fulfilled!")
}

function onRejected() {
  console.log("rejected!")
}

const promise = new Promise((resolve, reject) => {
  var xhr = new XMLHttpRequest();
  xhr.onreadystatechange = function() {
    if (xhr.readyState == 4) {
      console.log(xhr.responseText);

      resolve(); // 약속된 작업을 처리했다고 통지한다.
      // reject(); // 문제가 발생하여 약속된 작업을 거절한다고 알린다.
    }
  };
  xhr.open("GET", "http://localhost:3000/hello", true);
  xhr.send();
});

console.log("끝!");

// 약속한 작업이 이행됐을 때 호출될 함수와
// 약속된 작업이 거절됐을 때 호출될 함수를 한 번에 등록할 수 있다.
promise.then(onFulfilled, onRejected);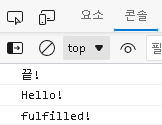
Promise - 익명 함수 활용하기
이행, 거절 함수를 별도 선언하지 않고 익명 함수로 바로 등록한다.
<script>
const promise = new Promise((resolve, reject) => {
  var xhr = new XMLHttpRequest();
  xhr.onreadystatechange = function() {
    if (xhr.readyState == 4) {
      console.log(xhr.responseText);

      resolve();
      //reject();
    }
  };
  xhr.open("GET", "http://localhost:3000/hello", true);
  xhr.send();
});

promise.then(function() {console.log("fulfilled!")}, function() {console.log("rejected!")});

console.log("끝!");
Promise - arrow function 활용하기
이행, 거절 함수를 arrow function으로 표현한다.
<script>
const promise = new Promise((resolve, reject) => {
  var xhr = new XMLHttpRequest();
  xhr.onreadystatechange = function() {
    if (xhr.readyState == 4) {
      console.log(xhr.responseText);

      //resolve();
      reject();
    }
  };
  xhr.open("GET", "http://localhost:3000/hello", true);
  xhr.send();
});

promise.then(() => console.log("fulfilled!"), () => console.log("rejected!"));

console.log("끝!");
Promise - then()의 리턴 값
then() 수행 후 새로운 Promise 객체가 리턴된다. 작업을 계속 이어서 수행하게 할 수 있다.
<script>
const promise1 = new Promise((resolve, reject) => {
  var xhr = new XMLHttpRequest();
  xhr.onreadystatechange = function() {
    if (xhr.readyState == 4) {
      console.log(xhr.responseText);

      resolve();
    }
  };
  xhr.open("GET", "http://localhost:3000/hello", true);
  xhr.send();
});

console.log("1111");

// then()
// - 작업을 정상적으로 수행했다는 통보가 왔을 때 호출될 함수를 등록한다.
// - 새로운 Promise 객체를 리턴한다.
// - then()에 등록된 함수의 실행이 정상적으로 끝나면 새로 리턴한 Promise 객체에 통보할 것이다.
let promise2 = promise1.then(() => console.log("fulfilled...1"));

console.log("2222");

// 다음과 같이 promise2.then()을 사용하여 작업 함수를 등록해두면,
// promise2의 작업(executor)이 끝나면 자동으로 호출될 것이다.
// 즉, promise.then()으로 등록한 작업 함수의 실행이 끝난 후 다음 순서로 호출될 것이다.
let promise3 = promise2.then(() => console.log("fulfilled...2"));

console.log("끝!");

// then()이 리턴하는 promise 객체는 서로 다른 객체이다.
console.log(promise1 == promise2);
console.log(promise1 == promise3);
console.log(promise2 == promise3);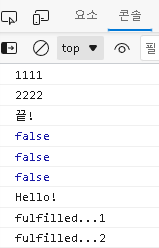
Promise - 작업 함수를 체인 방식으로 연결하기
promise1 이행 통지 → 이행 함수 수행 후 promise2 에 Promise 객체 리턴 → 이행 함수 수행 후 promise3 에 Promise 객체 리턴 → 이행 함수 수행 후 promise4 에 Promise 객체 리턴 → 이행 함수 수행 후 Promise 객체 리턴하지만 변수에 저장하지 않아 사라짐
const promise1 = new Promise((resolve, reject) => {
  var xhr = new XMLHttpRequest();
  xhr.onreadystatechange = function() {
    if (xhr.readyState == 4) {
      console.log(xhr.responseText);

      resolve(); // 작업이 완료되었다고 통지한다.
    }
  };
  xhr.open("GET", "http://localhost:3000/hello", true);
  xhr.send();
});

console.log("1111");

// 이전 작업 다음에 실행할 작업 함수를 등록하기
var promise2 = promise1.then(() => console.log("fulfilled...1"));

console.log("2222");

// 이전 작업 다음에 실행할 작업 함수를 등록하기
var promise3 = promise2.then(() => console.log("fulfilled...2"));

console.log("3333");

// 이전 작업 다음에 실행할 작업 함수를 등록하기
var promise4 = promise3.then(() => console.log("fulfilled...3"));

console.log("4444");

// 이전 작업 다음에 실행할 작업 함수를 등록하기
promise4.then(() => console.log("fulfilled...4"));

console.log("끝!");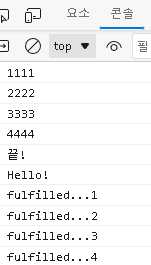
Promise - Method Chaining
이를 별도 분리하지 않고 Method Chanining으로 수행하게 할 수 있다.
<script>
new Promise((resolve, reject) => {
  var xhr = new XMLHttpRequest();
  xhr.onreadystatechange = function() {
    if (xhr.readyState == 4) {
      console.log(xhr.responseText);

      resolve(); // 작업이 완료되었다고 통지한다.
    }
  };
  xhr.open("GET", "http://localhost:3000/hello", true);
  xhr.send();
})
.then(() => console.log("fulfilled...1"))
.then(() => console.log("fulfilled...2"))
.then(() => console.log("fulfilled...3"))
.then(() => console.log("fulfilled...4"));

console.log("끝!");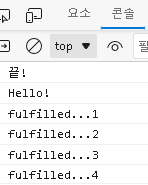
Promise - Promise(executor)의 작업 결과 받기
Promise의 작업자(executor)가 직업 return 한 것은 받을 수 없다.
<script>
const promise = new Promise((resolve, reject) => {
  // Promise(executor)의 작업자가 직접 리턴한 것은 받을 수 없다.
  return "결과!";
});

promise.then((result) => console.log(result));

console.log("끝!");
작업 결과는 resolve()의 argument로 전달하고 then에서 parameter로 받는다.
<script>
const promise = new Promise((resolve, reject) => {
  // 작업 결과는 resolve()의 아규먼트로 전달해야 한다.
  resolve("결과!");
});

// promise가 처리한 작업 결과는
// then(handler)으로 등록한 handler의 파라미터로 받는다.
promise.then((result) => console.log(result));

console.log("끝!");
promise의 작업 결과를 다루는 핸들러를 여러 개 붙일 수 있다.
<script>
const promise = new Promise((resolve, reject) => {
  resolve("결과!");
});

// promise의 작업 결과를 다루는 핸들러를 여러 개 붙일 수 있다.
promise.then((result) => console.log("1:", result));
promise.then((result) => console.log("2:", result));
promise.then((result) => console.log("3:", result));

console.log("끝!");
Promise - Promise(executor)의 작업 결과 받기 II
method chaining으로 작업 결과 핸들러를 여러개 붙일 수 없다.
<script>
new Promise((resolve, reject) => {
  resolve("결과!");
})
.then((result) => console.log("1:", result))
.then((result) => console.log("2:", result))
.then((result) => console.log("3:", result))

console.log("끝!");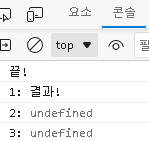
Promise - then(handler)의 작업 결과 받기
이전의 then() 핸들러가 리턴한 값을 받고 싶으면 then()이 리턴한 promise2에 핸들러 등록 후 핸들러의 파라미터로 받아라.
const promise1 = new Promise((resolve, reject) => {
  resolve("결과!");
});

// then()의 핸들러가 처리한 작업 결과를 리턴하고 싶다면,
// return 문을 사용하라!
const promise2 = promise1.then((result) => {
  console.log(result)
  return result + " => 1";
});

// 이전의 then() 핸들러가 리턴한 값을 받고 싶다면,
// then() 이 리턴한 promise2에 핸들러를 등록한 후
// 핸들러의 파라미터로 받아라.
promise2.then((result) => console.log(result));

console.log("끝!");
Promise - Method Chaining 기법으로 then(handler)의 작업 결과 받기
Promise 객체를 이행하고 "결과!"를 보낸다. then으로 받아 이행 함수에 parameter로 result로 받는다. 그리고 함수를 실행한다. return 하고 다음 then을 등록해서 이행시 실행할 함수를 등록하고 result로 앞의 return을 받는다. 함수를 실행하고 return하는데 다음 then에서 앞의 return을 result로 받는다. 그리고 함수를 실행한다.
<script>
new Promise((resolve, reject) => {
  resolve("결과!");
})
.then((result) => {
  console.log(result)
  return result + " => 1";
})
.then((result) => {
  console.log(result)
  return result + " => 2";
})
.then((result) => {
  console.log(result)
  return result + " => 3";
})
.then((result) => console.log(result));

console.log("끝!");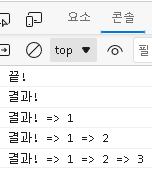
Promise - 예외처리: then(onFulfillment, onRejection)
Promise 객체의 작업자(executor) 함수에서 throw 예약어를 사용하면 오류가 발생한다. 그걸 then() 으로 받아서 거절시 수행할 함수를 등록하면 실행된다.
<script>
const promise = new Promise((resolve, reject) => {
  throw '오류 발생!!!';
})
.then(() => console.log("fulfilled!"),
      () => console.log("rejected!"));

console.log("끝!");
executor에서 오류가 발생하면 then()으로 등록한 reject 함수가 호출된다.

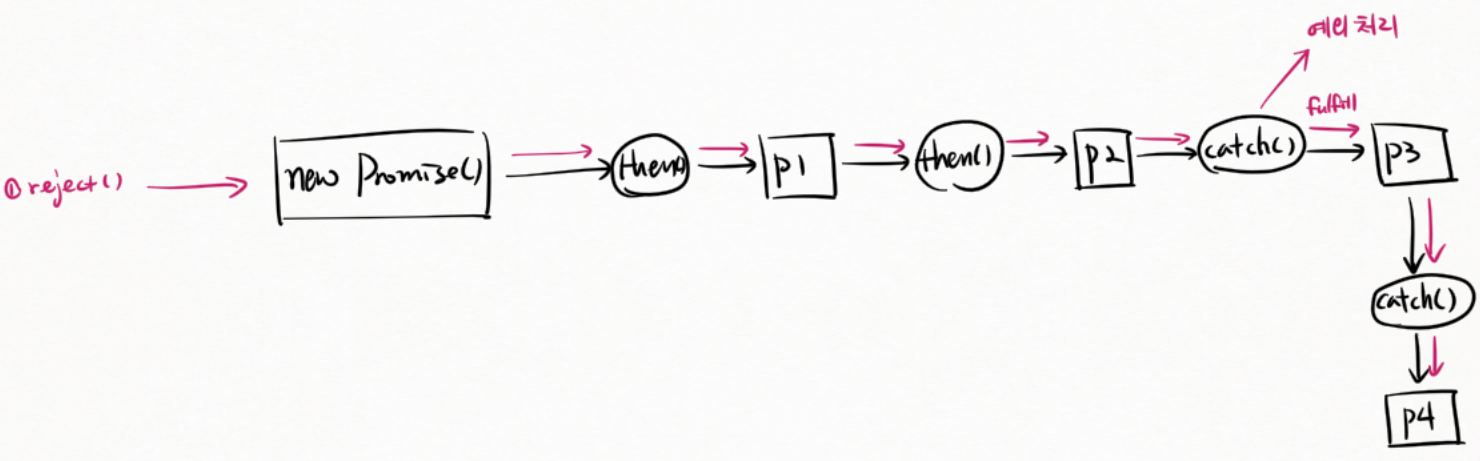
Promise chain
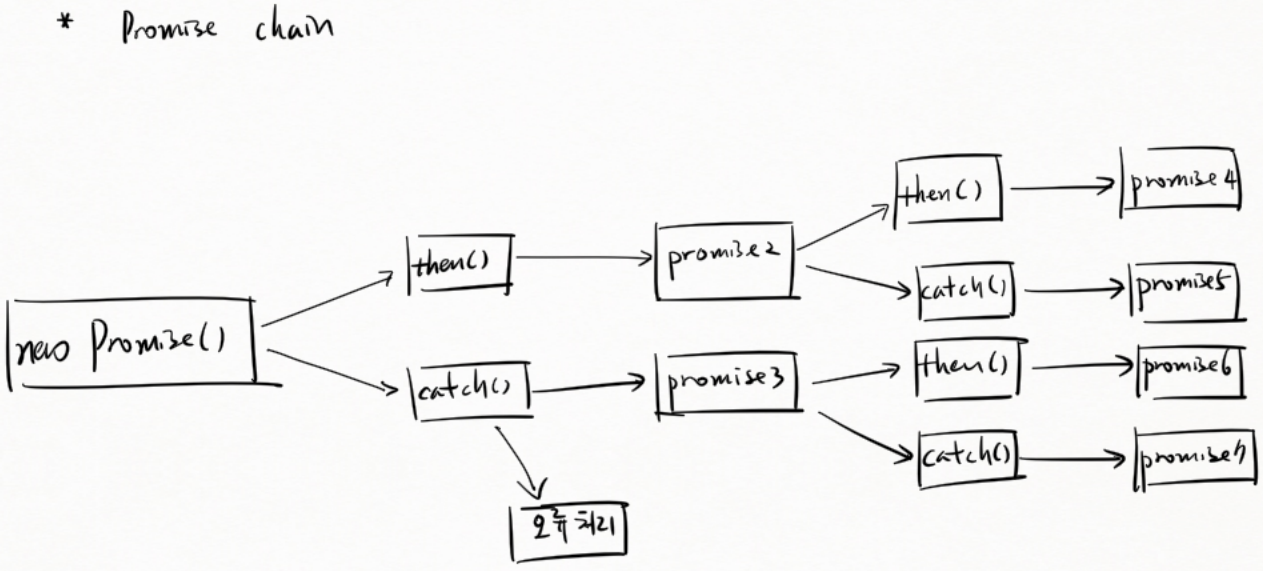
new Promise() 객체 이행시 then() 실행, 거절시 catch() 로 오류 처리 한다.
- then() 실행시 promise2 객체 생성되고 이행시 then() 실행하여 promise4 객체 생성, 거절시 catch() 실행하여 promise5 객체 생성되게 한다.
- catch() 실행시 promise3 객체 생성되고 이행시 then() 실행하여 promise6 객체 생성, 거절시 catch() 실행하여 promise7 객체 생성되게 한다.
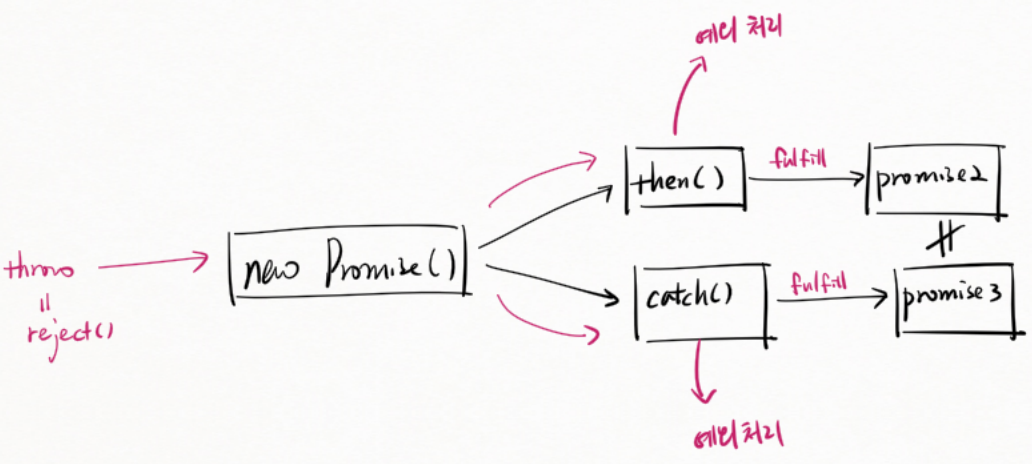
executor(실행자)의 throw는 reject() 와 동일하다. 예외를 new Promise로 던진다. 이때
- 이행 또는 거절시 then() 실행하며, 이행 통지면 fultill(이행)하여 promise2 객체 생성, 거절 통지면 예외 처리한다.
- 거절시 catch() 실행하며, 거절 통지면 fulfill(이행)하여 promise3 객체 생성, 이행 통지면 예외 처리한다.
이때 생성된 promise2와 promise3는 서로 다른 객체이다.
Promise - 예외처리: then(undefined, onRejection)
resolve() 의 핸들러를 등록하지 않고 undefined로 등록해도 된다.
<script>
const promise = new Promise((resolve, reject) => {
  throw '오류 발생!!!';
})
.then(undefined, // resolve()의 핸들러를 등록하지 않아도 된다.
      () => console.log("rejected!"));

console.log("끝!");
Promise - 예외처리: catch(onRejection)
then(undefined, onRejection) 과 동일하게 catch(onRejection) 으로 등록해도 된다.
<script>
const promise = new Promise((resolve, reject) => {
  throw '오류 발생!!!';
})
.catch(() => console.log("rejected!"));
// ==> then(undefined, onRejection) 과 동일하다.

console.log("끝!");
Promise - 예외처리: catch(onRejection)
promise 오류에 대한 reject 핸들러가 여러개 등록되어 있으면 순차적으로 모두 호출된다.
<script>
const promise = new Promise((resolve, reject) => {
  throw '오류 발생!!!';
});

// promise 오류에 대해 여러 개의 reject 핸들러가 등록되어 있으면
// 순차적으로 모두 호출된다.
const p2 = promise.then(undefined,
             () => console.log("rejected!"));
const p3 = promise.catch(() => console.log("catched!"));

console.log("끝!");

// then(), catch()가 리턴한 promise 객체는 서로 다른 객체이다.
console.log(p2 == p3);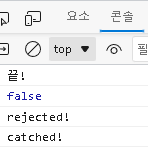
Promise - 예외처리: Method Chaining
then().catch() 처럼 등록되어 있으면 연결을 따라가서 오류 핸들러를 호출한다.
<script>
const promise = new Promise((resolve, reject) => {
  throw '오류 발생!!!';
})
.then(() => console.log("fulfilled!"))
.catch(() => console.log("catched!"));

// then()이 리턴한 promise 에 오류 핸들러가 등록되어 있다면,
// 그 연결을 따라가서 오류 핸들러를 호출한다.


console.log("끝!");
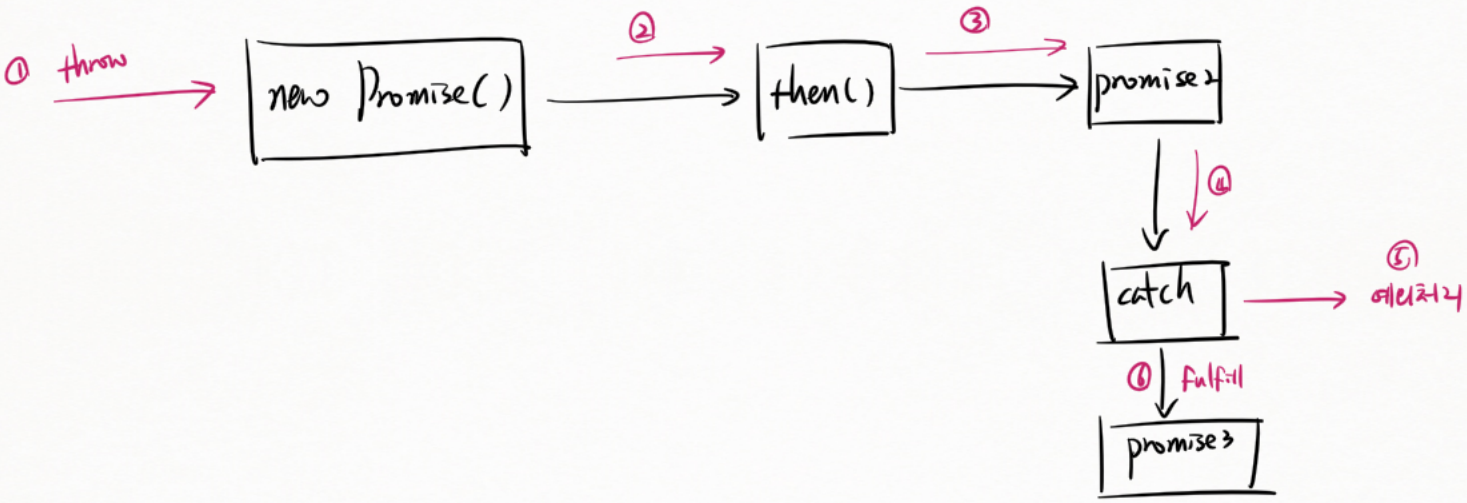
① throw로 예외 발생시켜 new Promise() 객체한테 던진다. 예외 통지를 ② then() 에 한다. ③ promise2 객체를 생성한다. 예외 처리를 하지 못하고 ④ catch로 가서 ⑤ 예외처리 하고 promise3 객체를 생성하여 이행 통지로 ⑥ fulfill을 전달한다.
Promise - 예외처리: Method Chaining II
오류 발생시 then() 이 리턴한 promise를 계속 따라가면서 예외 핸들러를 찾아 호출한다.
<script>
const promise = new Promise((resolve, reject) => {
  // resolve();
  throw '오류 발생!!!';
})
.then(() => console.log("fulfilled! - 1"))
.then(() => console.log("fulfilled! - 2"))
.then(() => console.log("fulfilled! - 3"))
.then(() => console.log("fulfilled! - 4"))
.catch(() => console.log("catched!"));

// 오류가 발생하면,
// then()이 리턴한 promise를 계속 따라가면서 예외 핸들러를 찾아 호출한다.

console.log("끝!");
위에서 resolve() 시
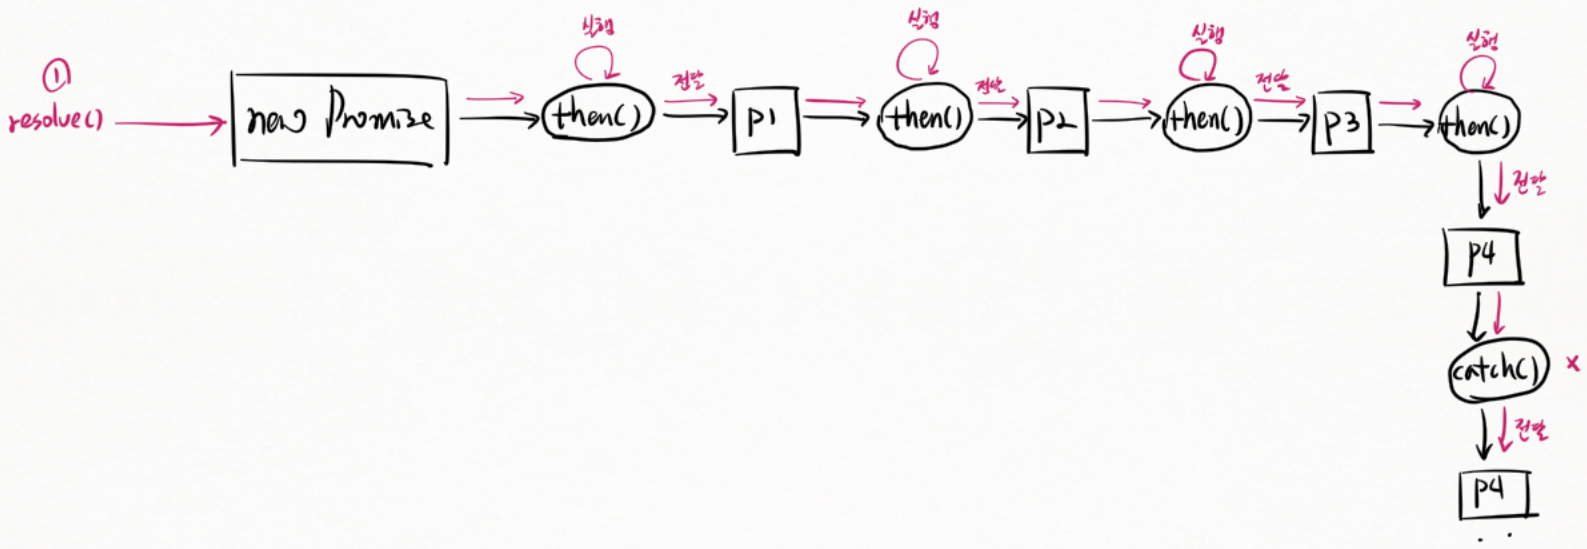
executor(실행자)의 ① resolve() 를 new Promise 객체로 전달한다. 이행 사실을 then()에 통지한다.
이행 통지를 받아 이행 함수를 실행하고 이행 통지를 생성된 p1 객체에 전달한다. 다음 then()으로 이행 사실을 통지한다.
이행 통지를 받아 이행 함수를 실행하고 이행 통지를 생성된 p2 객체에 전달한다. 다음 then()으로 이행 사실을 통지한다.
이행 통지를 받아 이행 함수를 실행하고 이행 통지를 생성된 p3 객체에 전달한다. 다음 then()으로 이행 사실을 통지한다.
이행 통지를 받아 이행 함수를 실행하고 이행 통지를 생성된 p4 객체에 전달한다. 다음 catch()로 이행 사실을 통지한다.
catch() 가 실행되지 않고 이행 통지를 p4 객체에 전달한다.
위에서 throw 시
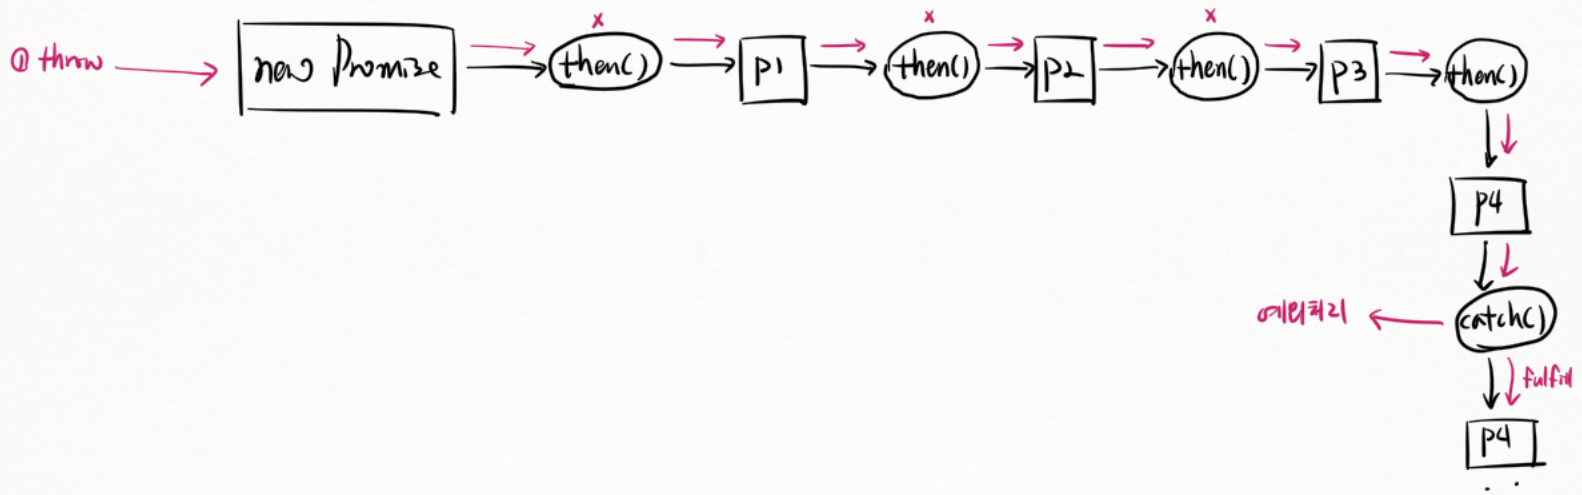
executor(실행자)의 ① throw 를 new Promise 객체로 전달한다. 예외 통지를 then()에 한다.
예외 통지를 받아 실행하지 않고 예외 통지를 생성된 p1 객체에 전달한다. 다음 then()으로 예외 통지한다.
예외 통지를 받아 실행하지 않고 예외 통지를 생성된 p2 객체에 전달한다. 다음 then()으로 예외 통지한다.
예외 통지를 받아 실행하지 않고 예외 통지를 생성된 p3 객체에 전달한다. 다음 then()으로 예외 통지한다.
예외 통지를 받아 실행하지 않고 예외 통지를 생성된 p4 객체에 전달한다. 다음 catch()로 예외 통지한다.
catch()에서 예외처리를 하고 이행 통지를 p4 객체에 전달한다.
catch() 로 예외를 처리하면 다음 promise 객체로 이행을 통지한다.
throw 와 reject() 이 같은 역할을 한다.
<script>
const promise = new Promise((resolve, reject) => {
  // resolve();
  reject();
  // throw '오류 발생!!!';
})
.then(() => console.log("fulfilled! - 1"))
.then(() => console.log("fulfilled! - 2"))
.catch(() => console.log("catched! - 1"))
.catch(() => console.log("catched! - 2"));

// 오류가 발생하면,
// - promise 체인을 따라가면서 예외 핸들러를 찾아 호출한다.
// - 예외를 처리한 후 체인에 연결된 다음 promise 객체로 fulfill을 통지한다.

console.log("끝!");
위에서 resolve() 시
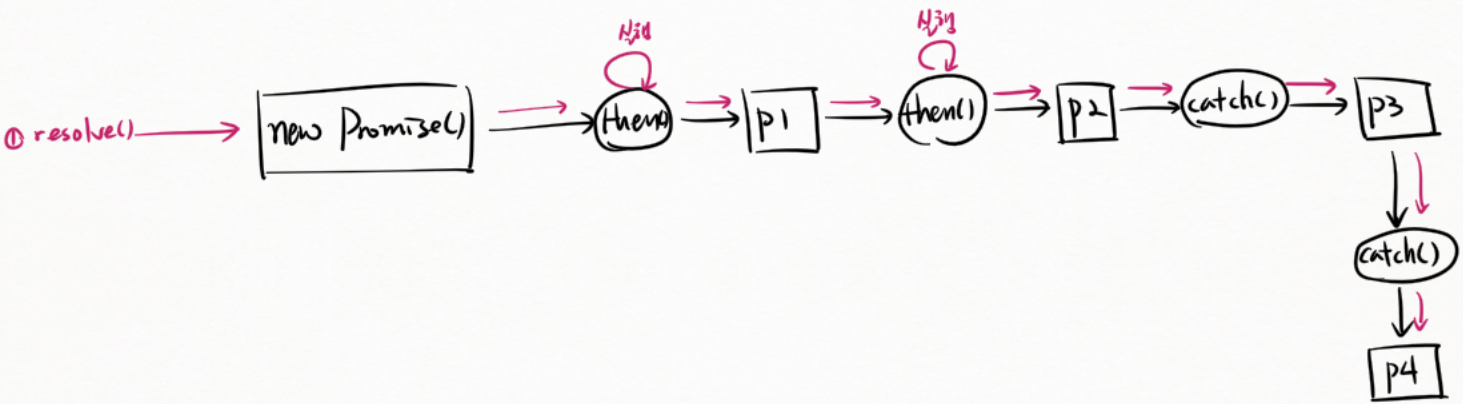
executor(실행자)의 ① resolve() 를 new Promise() 객체로 전달한다. 이행 통지를 then()에 한다.
이행 통지를 받아 이행 함수를 실행하고 이행 통지를 생성된 p1 객체에 전달한다. 다음 then() 으로 이행 통지한다.
이행 통지를 받아 이행 함수를 실행하고 이행 통지를 생성된 p2 객체에 전달한다. 다음 catch() 로 이행 통지한다.
이행 통지를 받아 실행하지 않고 이행 통지를 생성된 p3 객체에 전달한다. 다음 catch() 로 이행 통지한다.
이행 통지를 받아 실행하지 않고 이행 통지를 생성된 p4 객체에 전달한다.
위에서 reject() 시
executor(실행자)의 ① reject() 를 new Promise() 객체로 전달한다. 예외 통지를 then()에 한다.
예외 통지를 받아 생성된 p1 객체에 전달한다. 다음 then() 으로 예외 통지를 한다.
예외 통지를 받아 생성된 p2 객체에 전달한다. 다음 catch() 로 예외 통지를 한다.
catch() 에서 예외 처리를 하고 이행 통지를 생성된 p3 객체에 전달한다. 다음 catch() 로 이행 통지한다.
catch() 에서 이행 통지를 생성된 p4 객체에 전달한다.
promise 예외 발생시 then() 두 개는 건너뛰고 catch() 한다. 이때 이행을 통지해서 다음 catch()를 건너뛰고 then() 두 개는 수행한다.
<script>
const promise = new Promise((resolve, reject) => {
  // resolve();
  // reject();
  throw '오류 발생!!!';
})
.then(() => console.log("fulfilled! - 1"))
.then(() => console.log("fulfilled! - 2"))
.catch(() => console.log("catched! - 1"))
.catch(() => console.log("catched! - 2"))
.then(() => console.log("fulfilled! - 3"))
.then(() => console.log("fulfilled! - 4"));


console.log("끝!");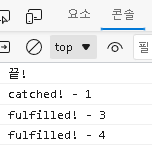
위에서 resolve() 시
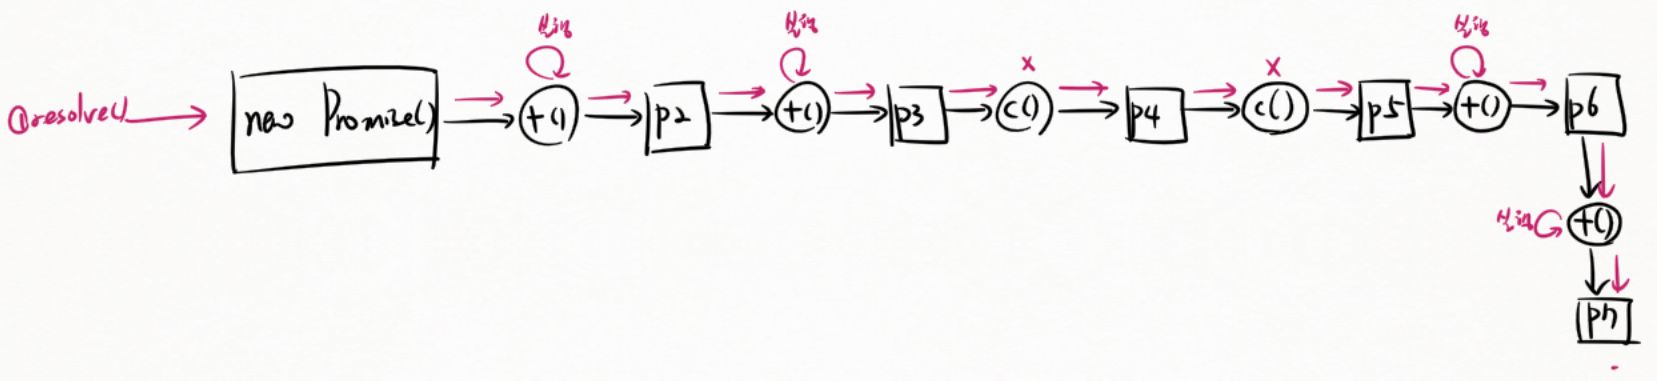
executor(실행자)의 ① resolve() 를 new Promise() 객체로 전달한다. 이행 통지를 then()에 한다.
이행 통지를 받아 이행 함수를 실행하고 이행 통지를 생성된 p2 객체에 전달한다. 다음 then() 으로 이행 통지 한다.
이행 통지를 받아 이행 함수를 실행하고 이행 통지를 생성된 p3 객체에 전달한다. 다음 catch() 로 이행 통지 한다.
catch() 에서 이행 통지를 생성된 p4 객체에 전달한다. 다음 catch() 로 이행 통지한다.
catch() 에서 이행 통지를 생성된 p5 객체에 전달한다. 다음 then() 으로 이행 통지한다.
이행 통지를 받아 이행 함수를 실행하고 이행 통지를 생성된 p6 객체에 전달한다. 다음 then() 으로 이행 통지 한다.
이행 통지를 받아 이행 함수를 실행하고 이행 통지를 생성된 p7 객체에 전달한다.
위에서 reject() 시
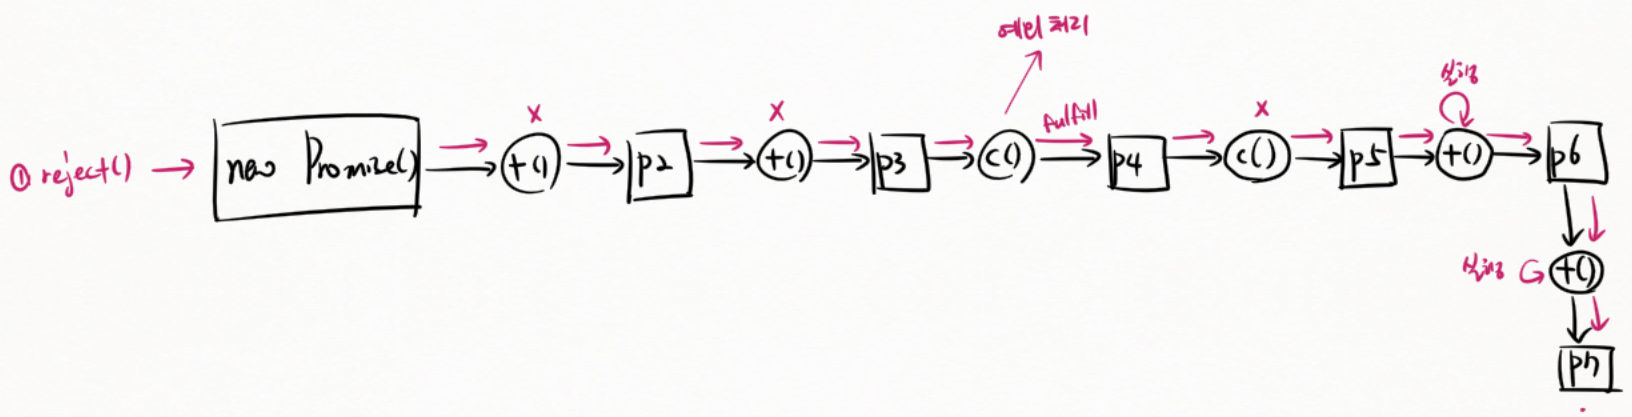
executor(실행자)의 ① reject() 를 new Promise() 객체로 전달한다. 예외 통지를 then()에 한다.
예외 통지를 받아 생성된 p2 객체에 전달한다. 다음 then() 으로 예외 통지 한다.
예외 통지를 받아 생성된 p3 객체에 전달한다. 다음 catch() 로 예외 통지 한다.
catch() 에서 예외 함수를 실행하고 이행 통지를 생성된 p4 객체에 전달한다. 다음 catch() 로 이행 통지한다.
catch() 에서 이행 통지를 생성된 p5 객체에 전달한다. 다음 then() 으로 이행 통지한다.
이행 통지를 받아 이행 함수를 실행하고 이행 통지를 생성된 p6 객체에 전달한다. 다음 then() 으로 이행 통지 한다.
이행 통지를 받아 이행 함수를 실행하고 이행 통지를 생성된 p7 객체에 전달한다.
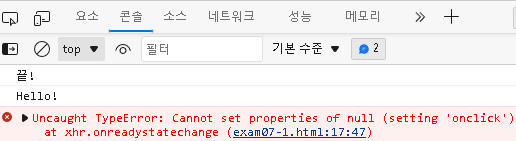
Promise - 비동기 작업에서 발생한 예외처리
예외가 발생했는데 reject() 를 명시하지 않으면 catch() 에서 예외를 받을 수 없다.
<script>
const promise = new Promise((resolve, reject) => {
  var xhr = new XMLHttpRequest();
  xhr.onreadystatechange = function() {
    if (xhr.readyState == 4) {
      console.log(xhr.responseText);

      // #btn 태그가 없기 때문에 다음 코드는 예외를 발생시킬 것이다.
      document.getElementById("#btn").onclick = () => {};
    }
  };
  xhr.open("GET", "http://localhost:3000/hello", true);
  xhr.send();
})
.catch(() => console.log("catched!"));

console.log("끝!");
executor에서 비동기 작업을 실행하는 중에 오류가 발생했을 때, 오류 핸들러가 호출되지 않는다.
해결책? 다음 예제!
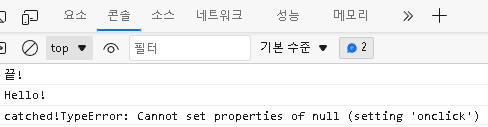
Promise - 비동기 작업에서 발생한 예외처리 II
예외 발생 가능성 있는 코드를 try { } 에 등록하고 catch { } 로 예외 발생시 reject() 를 호출한다. 그러면 catch() 에서 예외를 받을 수 있다.
<script>

const promise = new Promise((resolve, reject) => {
  var xhr = new XMLHttpRequest();
  xhr.onreadystatechange = function() {
    if (xhr.readyState == 4) {
      try {
        // 비동기 함수에서 코드를 실행할 때
        // 예외가 발생할 수 있는 코드는 try 블록 안에 둬라!
        //
        console.log(xhr.responseText);
        document.getElementById("#btn").onclick = () => {};

      } catch(err) {
        // 예외가 발생했을 때 reject() 를 호출하여
        // 오류가 났음을 통지하라!
        reject(err);
      }
    }
  };
  xhr.open("GET", "http://localhost:3000/hello", true);
  xhr.send();
})
.catch((reason) => console.log("catched!" + reason));

console.log("끝!");
executor에서 비동기 작업을 실행하는 중에 오류가 발생했을 때, 명시적으로 reject() 호출하여 오류가 발생했음을 통지해야 한다.
Promise - then() 핸들러에서 일반 값을 리턴할 때
핸들러에서 리턴한 값은 다음 핸들러에게 그대로 전달된다.
<script>

const promise = new Promise((resolve, reject) => {
  setTimeout(() => {
    resolve('{"title": "test..ok!", "content": "내용입니다!"}');
  }, 3000);
})
.then((text) => {
  console.log(text)
  // 핸들러에서 리턴한 값은
  // 다음 핸들러에게 그대로 전달된다.
  return JSON.parse(text);
})
.then((obj) => console.log(obj));

console.log("끝!");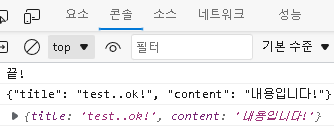
Promise - then() 핸들러에서 Promise 객체를 리턴할 때
then() 에서 Promise 객체를 새로 생성해서 return 하면 똑같이 then() 으로 받는다.
<script>

const promise = new Promise((resolve, reject) => {
  setTimeout(() => {
    resolve('{"title": "test..ok!", "content": "내용입니다!"}');
  }, 3000);
})
.then((text) => {
  console.log(text)
  // Promise 객체를 리턴하면,
  // Promise의 executor를 실행한 후
  // executor에서 resolve()로 넘겨준 값이
  // 다음 핸들러에게 전달된다.
  return new Promise((resolve, reject) => {
    console.log("Deserialization: ");
    resolve(JSON.parse(text));
  });
})
.then((obj) => console.log(obj));

console.log("끝!");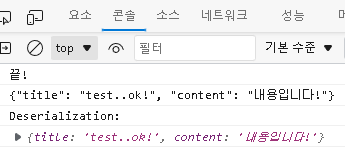
Fetch API
XMLHttpRequest 사용하기
기존의 데이터 요청 방법은 XMLHttpRequest 객체 사용으로 하였다.
// ex09\exam01.html

<table border="1">
<thead>
    <tr><th>번호</th><th>제목</th><th>작성자</th><th>조회수</th></tr>
</thead>
<tbody>
</tbody>
</table>

<script>
"use strict"
var tbody = document.querySelector("tbody");

var xhr = new XMLHttpRequest();
xhr.onreadystatechange = () => {
    if (xhr.readyState == 4 && xhr.status == 200) {
        var arr = JSON.parse(xhr.responseText);
        for (var b of arr) {
            var tr = document.createElement("tr");
            tr.innerHTML = "<td>" + b.no + "</td>" +
                "<td>" + b.title + "</td>" +
                "<td>" + b.writer + "</td>" +
                "<td>" + b.viewCnt + "</td>";
            tbody.appendChild(tr);
        }
    }
};
xhr.open("GET", "http://localhost:3000/boards", true);
xhr.send();
// app.js 추가
app.get('/boards', (req, res) => {
res.set('Access-Control-Allow-Origin', '*');
res.set('Content-Type', 'text/html; charset=UTF-8');
let arr = [
{no:1,title:'제목1',writer:'홍길동',viewCnt:19},
{no:2,title:'제목2',writer:'임꺽정',viewCnt:312},
{no:3,title:'제목3',writer:'유관순',viewCnt:31},
{no:4,title:'제목4',writer:'안중근',viewCnt:100},
{no:5,title:'제목5',writer:'윤봉길',viewCnt:200}
];
setTimeout(() => {
res.send(JSON.stringify(arr));
}, 3000);
});
fetch() 사용하기
fetch(URL) 로 사용하며 Promise 객체를 반환한다.
response.text() 메서드로 응답에서 텍스트를 추출한다.
<script>
"use strict"
var tbody = document.querySelector("tbody");

let promise = fetch("http://localhost:3000/boards");
let promise2 = promise.then((response) => {
    return response.text(); // 응답에서 텍스트를 추출할 Promise 객체
});
promise2.then((text) => {
    var arr = JSON.parse(text);
    for (var b of arr) {
        var tr = document.createElement("tr");
        tr.innerHTML = "<td>" + b.no + "</td>" +
            "<td>" + b.title + "</td>" +
            "<td>" + b.writer + "</td>" +
            "<td>" + b.viewCnt + "</td>";
        tbody.appendChild(tr);
    }
});
fetch()
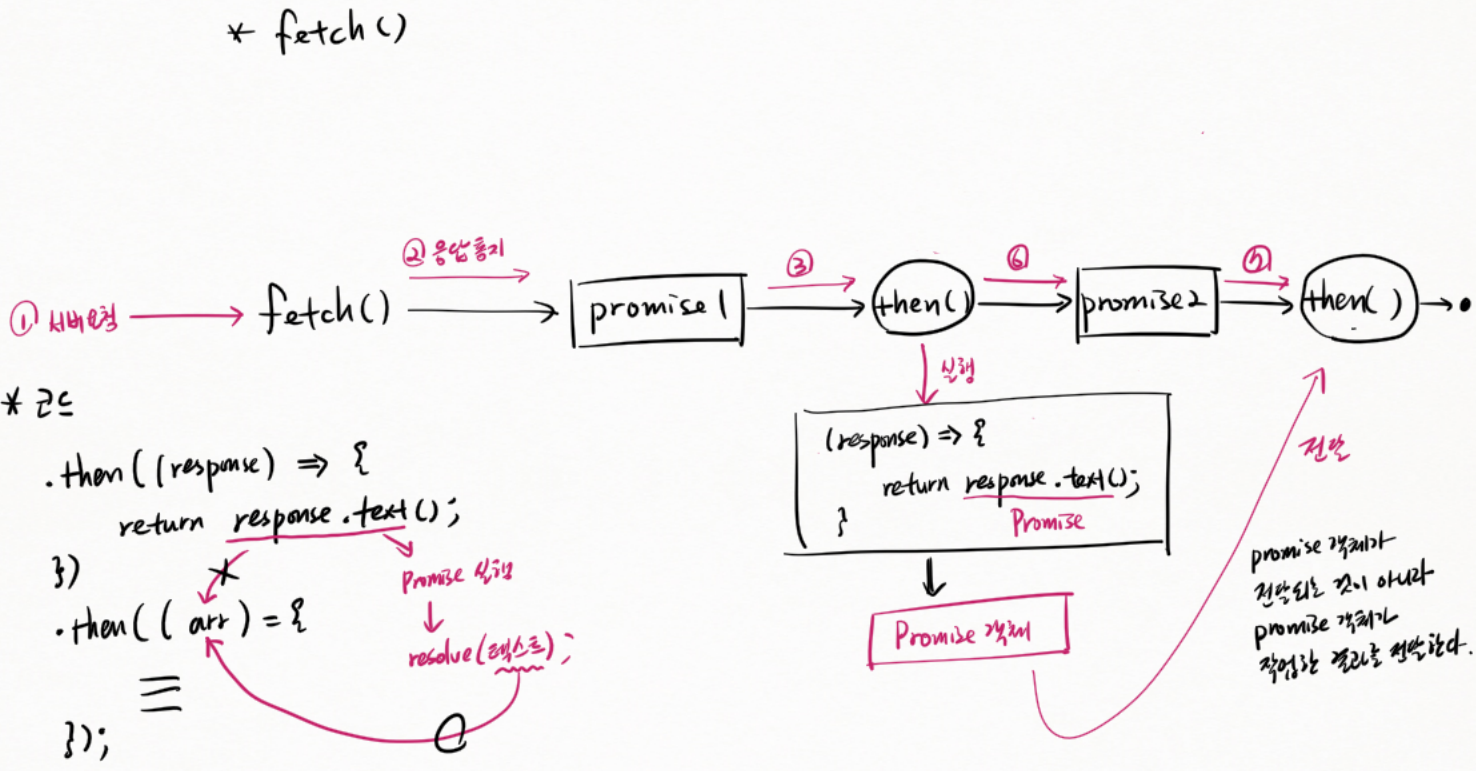
그림 왼쪽 *코드에서 response.text() 역할은 Promise 실행에서 resolve(텍스트) 와 같다. 이 return 값을 다음 then에서 arr에 전달한다.
① 서버 요청을 위해 fetch() 사용한다. ② 응답 통지받고 promise1 객체를 생성한다. then()에 ③ 이행 통지하고 이행 함수 실행한다. promise1 객체의 결과를 response로 받아 .text() 메서드 수행하여 결과를 return한다. ⑥ 이행 통지를 생성된 promise2 객체에 전달한다. ⑦ 이행 통지를 then() 에 전달한다. promise 객체가 전달되는 것이 아니라 promise 객체가 작업한 결과를 전달한다.
response.json() 메서드로 텍스트를 추출하여 json을 deserialization 하여 객체로 만든다.
<script>
"use strict"
var tbody = document.querySelector("tbody");

let promise = fetch("http://localhost:3000/boards");
let promise2 = promise.then((response) => {
    return response.json(); // 응답에서 텍스트를 추출하여 객체로 deserialization를 수행하는 Promise 객체
});
promise2.then((arr) => {
    for (var b of arr) {
        var tr = document.createElement("tr");
        tr.innerHTML = "<td>" + b.no + "</td>" +
            "<td>" + b.title + "</td>" +
            "<td>" + b.writer + "</td>" +
            "<td>" + b.viewCnt + "</td>";
        tbody.appendChild(tr);
    }
});
위에서 별도 변수 선언하지 않고 아래처럼 할 수 있다.
<script>
"use strict"
var tbody = document.querySelector("tbody");

fetch("http://localhost:3000/boards")
.then((response) => {
    return response.json();
})
.then((arr) => {
    for (var b of arr) {
        var tr = document.createElement("tr");
        tr.innerHTML = "<td>" + b.no + "</td>" +
            "<td>" + b.title + "</td>" +
            "<td>" + b.writer + "</td>" +
            "<td>" + b.viewCnt + "</td>";
        tbody.appendChild(tr);
    }
});
조언
*
과제
/
'네이버클라우드 AIaaS 개발자 양성과정 1기 > Javascript' 카테고리의 다른 글
| [Javascript] 코딩애플 - ?. | ?? 연산자 (0) | 2023.01.02 |
|---|---|
| [Javascript] 자바스크립트 코딩의 기술 - 조 모건 (0) | 2022.12.26 |
| [비트캠프] 34일차(7주차4일) - 해커톤: 공공데이터 이용 웹서비스 만들기 (0) | 2022.12.22 |
| [비트캠프] 33일차(7주차3일) - UI 다루기(Bootstrap vs jQuery) (0) | 2022.12.21 |
| [비트캠프] 32일차(7주차2일) - jQuery(자바스크립트 라이브러리 만들기2, minify) (0) | 2022.12.20 |

